What to Expect During a 3-Day Flooring Installation
A day-by-day walkthrough of how Zona Floors completes a full home flooring installation in just three days — from subfloor prep to final trim.
You know how disruptive a major home project can feel, especially when floors are torn up. The thought of noise, dust, and displaced furniture makes many homeowners hesitate.
We consistently find that a well-organized plan changes that entire experience.
Knowing exactly what to expect during a 3-day flooring installation turns a stressful event into a smooth process. This guide breaks down the specific daily schedule for a typical whole-home flooring installation across the Phoenix metro area. Let’s look at the data and explore a few practical ways to prepare your space.
Before Day 1: Preparation
We handle the heavy lifting of measurements and material selection during your initial consultation. The real physical preparation starts about two days before the crew arrives.
Material acclimation is a strict requirement for products like luxury vinyl plank and laminate. We deliver your new flooring 48 hours early to adjust to your home’s climate. Skipping this step causes major expansion issues, especially in Arizona where a hot warehouse and a cool living room can differ by 20 degrees.
Major manufacturers require the indoor temperature to remain between 65 and 85 degrees Fahrenheit during this period. Before the installation begins, you will need to complete a few specific tasks:
- Relocate small items from the work zones, including decor, electronics, and fragile objects.
- Clear floor-level closet space so installers have unobstructed access to the edges.
- Secure pets in a quiet room or arrange for a boarding service to keep them safe from loud cutting tools.
- Set a comfortable temperature by keeping your air conditioning running constantly.
Our crews handle the large furniture items for you. Installers shift heavy pieces systematically from room to room, eliminating the need to empty your entire house at once.
Day 1: Demolition and Subfloor Prep
Morning Demolition and Silica Dust Control
We arrive early, usually between 7:00 AM and 8:00 AM, to take advantage of the cooler morning hours. The first major task involves removing your existing floors, which varies widely depending on the material:
- Carpet: Comes up fast in large rolls, usually taking a standard home just two to three hours.
- Floating planks: Click-together materials are pulled up cleanly with minimal debris.
- Tile: Requires heavy chipping and grinding, taking up the most time.
Tile removal presents a totally different challenge because it generates an immense amount of crystalline silica dust.
We strictly adhere to OSHA’s 29 CFR 1926.1153 safety regulations to protect your indoor air quality. High-efficiency particulate air vacuums, like Festool or CS Unitec systems, capture 99.97% of airborne dust at the source.
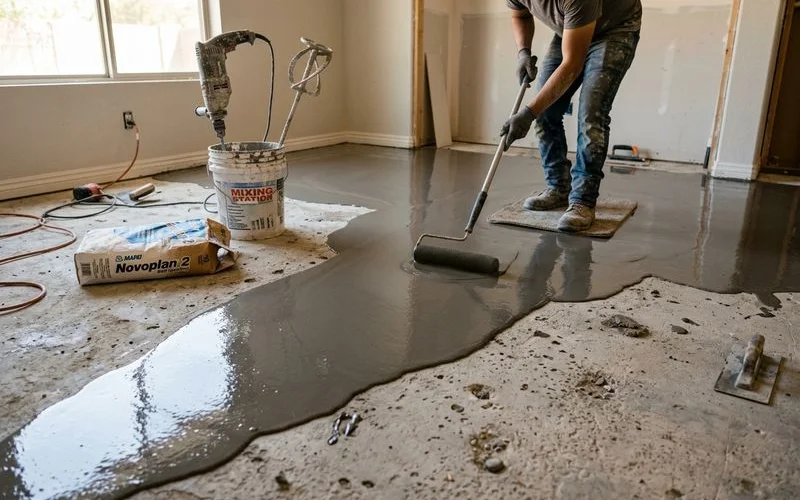
Afternoon Moisture Testing and Leveling
We assess and prepare the exposed concrete slab or plywood once the old materials are gone. This phase dictates whether your new floors will lay completely flat and reach their 20-year lifespan.
Arizona slabs are notorious for hiding moisture, which quickly ruins a new installation. We use highly accurate pinless concrete moisture meters, such as the Wagner C555, to verify the slab is dry, and apply epoxy vapor barriers if elevated levels are found.
Installers spend the rest of the afternoon grinding down high spots and filling low areas with professional-grade self-leveling compounds from brands like Mapei or Bostik. A standard 3-millimeter layer of leveling compound requires about 24 hours to fully cure, which is exactly why your home will sit with exposed subfloors overnight.
What to Expect During a 3-Day Flooring Installation: Day 2
Morning Progress and Expansion Gaps
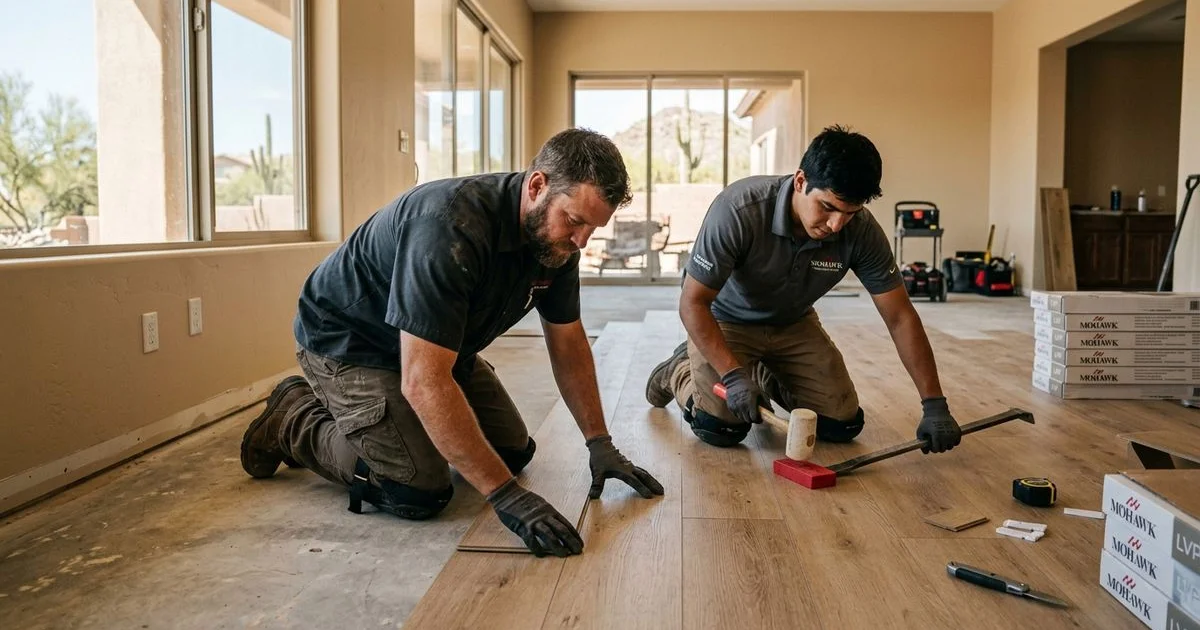
We begin laying the fresh materials in the largest central room on the second day. This is the most visually dramatic part of the project.
For floating systems using a click-lock design like Uniclic, installers place the underlayment first and connect the planks row by row.
| Flooring Type | Average Installation Speed (Per Morning) | Curing Time Required |
|---|---|---|
| Click-Lock LVP | 500 - 800 sq ft | None (Immediate walkability) |
| Porcelain Tile | 150 - 250 sq ft | 24 Hours (Overnight) |
We must leave a mandatory 1/4-inch to 3/8-inch expansion gap around the entire perimeter of the room to accommodate seasonal humidity and temperature shifts. Pushing the planks flush against the drywall restricts this natural movement, and the intense Arizona heat will cause a restricted floating floor to buckle.
Afternoon Challenges and Curing Timelines
We continue the installation into hallways, bedrooms, and closets throughout the afternoon. Your large furniture items are moved back into the completed rooms as the crew progresses.
Certain architectural features will naturally slow the pace of the work, as staircases demand precise cuts for every single tread and riser. Closets require careful maneuvering, while transition zones between different flooring types need exact fittings.
We adjust our timeline expectations significantly if you selected a porcelain tile upgrade, which requires individual mortar setting and overnight curing. You can walk on new laminate or vinyl immediately, ending the second day with a highly functional home.
Day 3: Completion and Detail Work
Morning Trim and Transition Details
We dedicate the final morning entirely to the finishing touches that distinguish a professional job from a basic DIY project. The raw expansion gaps left on day two must now be covered.
Baseboard selection plays a massive role in the final aesthetic of the space. While standard 3-inch rounded baseboards are common, 2026 design trends strongly favor flat, minimalist profiles.
We highly recommend upgrading to a 5-inch or 6-inch tall flat baseboard to make standard 8-foot ceilings appear much higher. The crew also secures the correct transition strips at doorways based on the flooring heights.
| Transition Profile | Best Application | Purpose |
|---|---|---|
| T-Molding | Rooms with equal floor heights | Bridges the gap cleanly without a slope |
| Reducer Strip | Meeting a lower floor surface | Creates a safe, gradual ramp down |
| Quarter Round | Baseboards meeting flooring | Hides expansion gaps seamlessly |
Afternoon Inspections and Clean Up
We perform a comprehensive quality check across every installed room after lunch. The lead installer inspects plank alignment, transition strip security, and edge cuts around custom cabinets.
Interior doors often require a slight trim at the bottom so they swing freely over the new, taller surface.
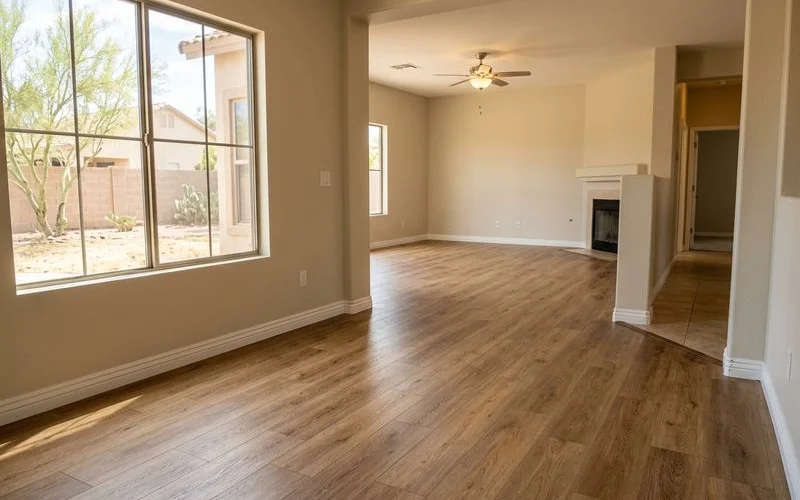
We finish the project with a thorough property cleanup. The crew vacuums all work zones, wipes down dusty surfaces, and hauls the construction debris away, leaving you a fully furnished home.
Factors That Can Extend the Timeline
We find that a standard three-day schedule covers the vast majority of local installations. A few specific scenarios will naturally add time to the project.
Older properties require extra precautions before demolition begins. Homes built before 1980 often hide asbestos in original vinyl tiles or old black mastic adhesives.
We must pause work and arrange for professional asbestos abatement if testing confirms hazardous materials. This safety protocol easily adds several days to the schedule.
Other common timeline extensions include:
- Heavy tile demolition over a massive concrete slab.
- Severe structural damage affecting the plywood subfloor on raised foundations.
- Custom tile layouts like herringbone patterns, which require precise, slow measurements.
- Massive square footage, pushing homes over 2,500 square feet into a four-day window.
We communicate all timeline expectations clearly during your initial consultation. The project manager will call you immediately if any hidden subfloor damage emerges after demolition.
Tips for a Smooth Installation
We have successfully completed hundreds of upgrades across Tempe, Mesa, Chandler, and Scottsdale. Following a few specific guidelines makes the entire process easier for everyone.
Here are the best ways to prepare your household for an active job site:
- Maintain a 70-degree climate: Temperature control directly impacts plank flexibility and adhesive curing times.
- Stay accessible by phone: We need quick approvals if the concrete moisture meter reveals hidden slab issues on day one.
- Create a temporary kitchen: Your main cooking area will be off-limits, so set up a microwave station in a finished room.
- Identify fragile items: Point out any delicate furniture pieces before our team starts moving heavy objects.
Conclusion
We know that inviting a crew into your personal space requires a leap of faith. Understanding what to expect during a 3-day flooring installation removes the anxiety from the equation.
You get to bypass the messy DIY mistakes and jump straight to enjoying a beautiful, durable new surface.
We ensure you have all the facts before the demolition starts. Ready to schedule your installation? Get your free in-home estimate or call Zona Floors at 480-428-5080.

Thomas Inman
Owner, Zona Floors
Thomas Inman founded Zona Floors in 2022 with a mission to bring honest pricing and quality craftsmanship to homeowners across Maricopa County.
Arizona ROC License #336899 · Thumbtack Top Pro 2023–2025
Looking for professional help?
Learn about our Flooring Installation service →